Showing posts with label White Wine. Show all posts

Orange & Dill Salmon

TUESDAY, MAY 11TH, 2010

4 stars (out of 5 - an easy salmon dish, with an interesting blend of flavours)

1 serving = ~209 calories.

I am really trying to get SB to eat more fish, less red meat which means that I am now trying to conquer my fear/disgust of cooking fish. I have a Company's Coming cookbook that has a lot of really good, yet really simple fish recipes, and this is another one of them. I decided to try it out today because I needed to make the marinade in the afternoon.

Ingredients:

1/2 cup (125 mL) orange juice
1/3 cup (75 mL) maple syrup
1/4 cup (60 mL) dry white wine
1/4 cup chopped fresh dill*
1 tbsp (15 mL) soy sauce
Up to 4 salmon steaks, ~2cm/1" thick, 113 g each**

{*Note. You can also use 1 tbsp of dill weed if you prefer. I used fresh dill and then sprinkled some dill weed over top for good measure}.

{**Note. I only cooked 1 salmon steak, but the recipe is for up to four}.
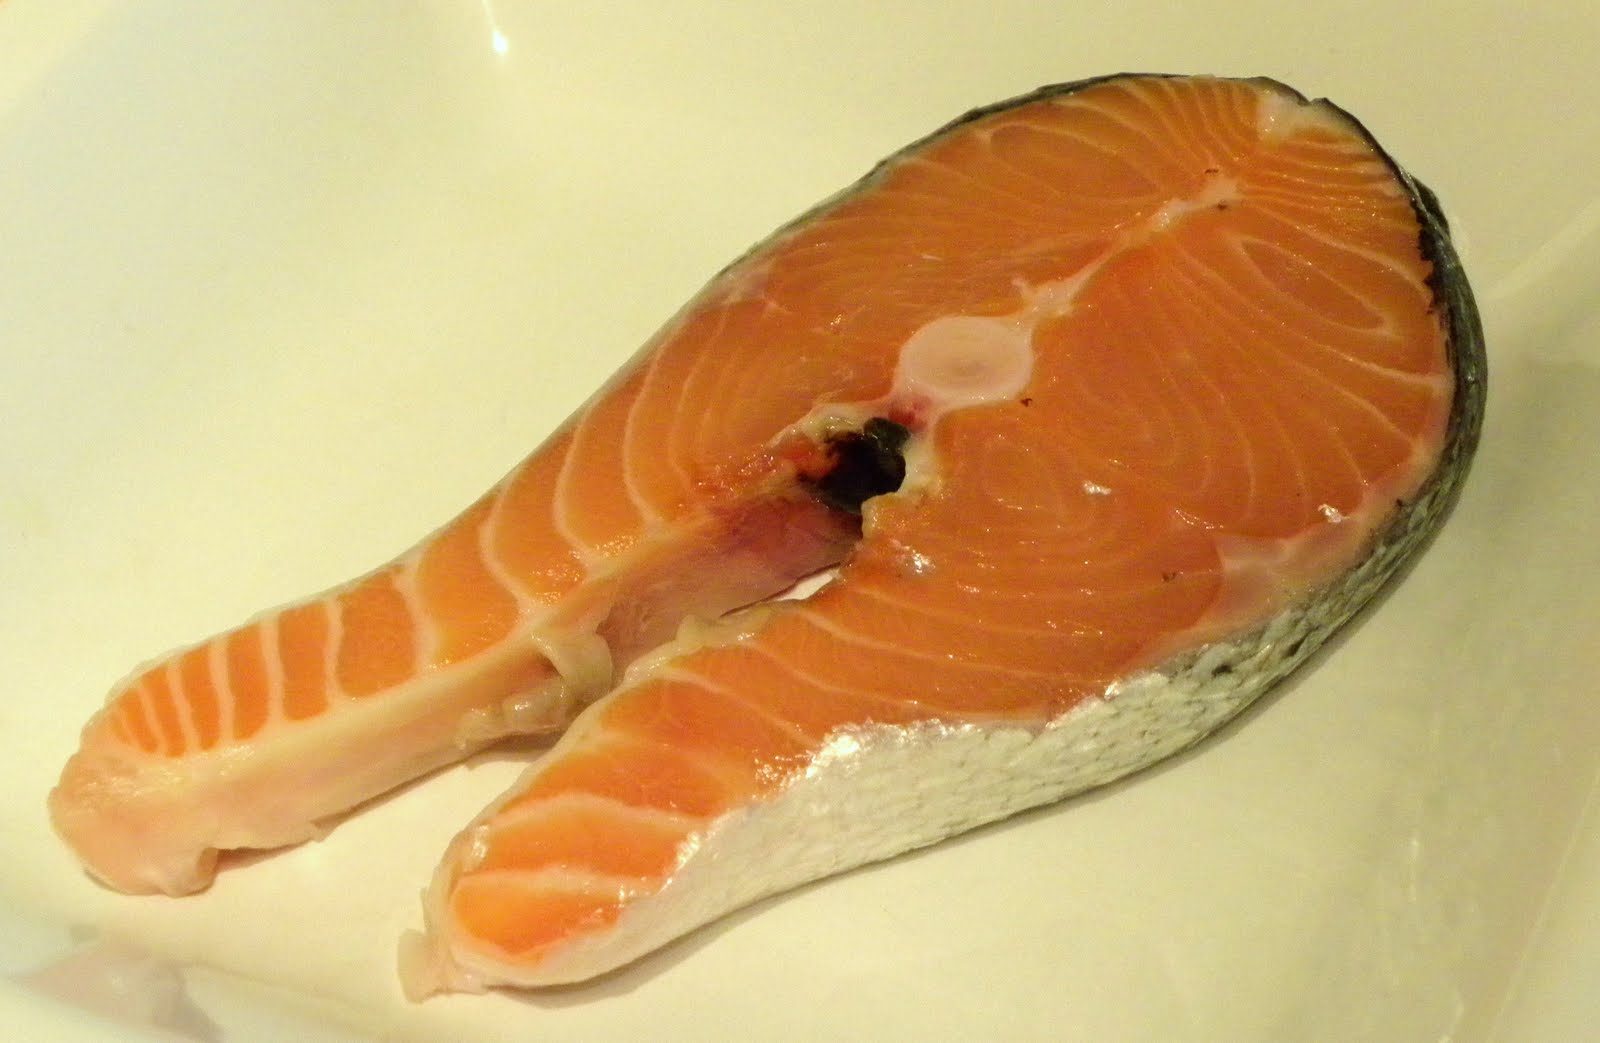

1. First, I combined the first 5 ingredients in the small bowl, and mixed well.


2. I then placed the salmon in the bowl, covered it, and stuck it in the fridge for up to 4 hours.


3. When I was ready to cook, I removed the salmon from the marinade (and discarded the leftover marinade), and fried it with some olive oil on medium heat in a non-stick pan for about 3-4 minutes per side (until it flaked away easily). The original recipe said to use an electric grill (or gas bbq to medium), and to cook it 5 minutes per side. I think I will have to get one of those!).

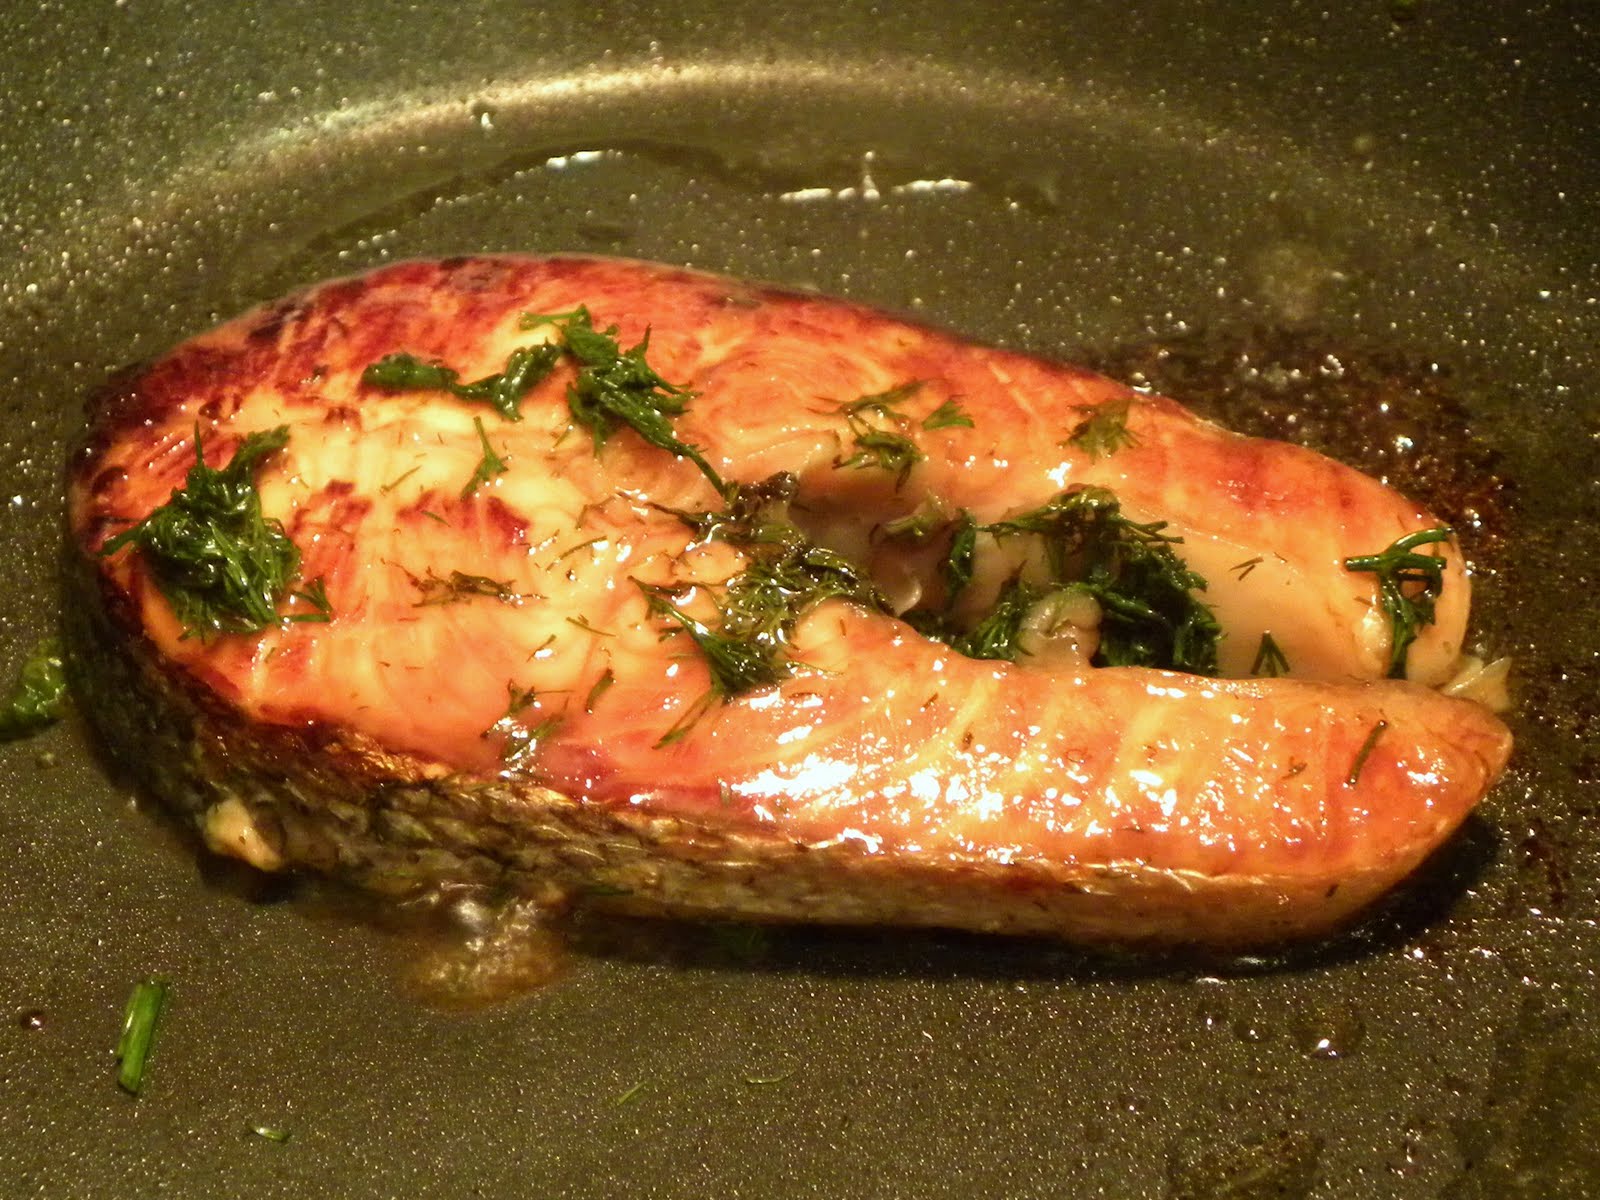


4. I served it with some baked asparagus (and a avocado-orange salad on the side - post to come!).


Overall, this was really easy to prepare ahead (the most time-consuming process was chopping up the dill, and it still only took about 5 minutes) and then just fry up when I was ready. SB said it was a really interesting mix of flavours with the maple, and that they blended together well. It was nice and moist and flaky inside. I might try this again with a grill. One note, SB kept adding the dill to the frying fish, which is why it blackened so much. I think that (presentation-wise) it might have looked better if we hadn't done that, or had used a grill instead.

Veal Cutlets w/ White Wine Sauce

SATURDAY, FEBRUARY 20TH, 2010

3.5 stars (out of 5 - just needs less salt!)

I found this super simple recipe recently, and decided to test whether it really was as easy as it seemed! It was a pretty good, super-quick recipe, but needed a bit of adjustment (see notes below).

Ingredients (makes just over 1 cup wine sauce; adjust accordingly):

Veal cutlets (1-2 per person)
Flour
3 tbsp margarine*
2 tbsp flour
Salt, to taste**
Pepper, to taste
1 1/2 tsp bouillon (veggie or beef)
1 cup milk
2 tbsp white wine

{*Note. The recipe suggests using margarine, as butter will brown too quickly.}

{**Note. The original recipe called for salt, but I found it was too salty, so add with caution. I would suggest excluding the salt until the sauce is almost fully prepared, and then adding it to your taste near the end.}

1. First, I dredged the meat in flour. This gives it a crispier coating,when it cooks, which I like; however, this step is optional.


2. I then melted 1 tbsp of margarine in frying pan over medium heat. When it was hot, I added the meat, cooking to your preference of readiness. This was my chick'n version.


3. I set the meat aside on a heated plate, and kept warm. Using the same pan, I melted the remaining 2 tbsp of margarine over medium heat.


4. I then mixed the bouillon, flour, and pepper in a bowl...


5. ...and added it to the margarine, stirring it until it was smooth. This was a bit difficult, but I tried.


6. Finally, I gradually added the milk and wine, stirring constantly until it is bubbly and thickened. Even though I used skim milk, the mixture was very thick. However, I found it incredibly difficult to get all of the lumps out. In the end, it wasn't lumpy (enough to notice), but next time I think I will use my mini blender to make it easier on my arms.


7. I then drizzled some sauce on a warmed plate, placed the meat on top of it, and drizzled more sauce over top. We served with mashed potatoes. Sorry, no final pic!

Overall, this truly was a super simple recipe. The only difficulty was with the lumpy sauce, which we eventually worked out. The version of the sauce in the book was very salty, so I will try this again without the salt. I liked the ease at which the sauce thickened (sometimes I have a problem with this). As for the flavour, it was good, but not incredible. I actually think that a bit more white wine might kick it up a notch, so perhaps I will try that as well next time (at the risk of the sauce thickness). But there will definitely be a next time!

Mushroom-Thyme Appy

SATURDAY, FEBRUARY 20TH, 2010

3 stars (out of 5 - pretty tasty, but not absolutely amazing)

I decided to make another vegetarian slow-cooker recipe, and thought that this appetizer looked good (also, I'm trying to acquire a taste for mushrooms). It was quite good and pretty tasty - I particularly liked the tangy-ness that the wine added; however, it wasn't absolutely amazing. I think I would like to try this again with another herb... perhaps rosemary?

Ingredients*:

3 green onions, chopped
2 packages of mushrooms (2x 227g), roughly chopped
1/4 cup olive oil (a little bit less)
1 tsp dry thyme
1/4 tsp salt
Pepper, to taste
1/3 cup plain cream cheese
1/4 cup dry white wine
Baguette

{*Note. This is enough for quite a few people (see pics below), so if you are making it just for two people I would make only half of this.}

1. First, I chopped the green onions and added them to the slow cooker along with the olive oil, turning the slow cooker on "High".


2. While the green onions were being cooked, I chopped up the mushrooms. I used a food processor, so they were chopped up very finely; however, with the length of time that they cook in the slow cooker, you could probably chop them up fairly coarsely.

3. I then added the mushrooms, thyme, and salt to the slow cooker, and stirred the mixture well. I switched the slow cooker onto "Low" and let the mixture cook for 6 hours.


4. After the mushrooms were very soft, I again stirred the mixture thoroughly. If there is any excess liquid, it should be drained.


5. ... and added the mushroom mixture, cream cheese, pepper, and white wine to my food processor, and mixed until smooth.


6. I placed it in a bowl, and served with baguette (you can toast these if you choose).


Overall, I thought this was a pretty good appy. It was easy enough to make, although I wasn't really sure why the slow-cooker was necessary. I felt that you could cook the mushrooms on the stove just as easily, and they would be ready in 10 minutes. I actually quite liked the flavour, even though it has a very strong mushroom taste. I just think that there might be a better herb to add to make it better. I would definitely recommend it, though!

Chicken Piccata & Broccoli w/ Creamy Chive Sauce

TUESDAY, AUGUST 4TH, 2009

3.5 stars (out of 5 - easy and pretty good) for the Chicken
2 stars (out of 5 - not great, not great) for the Broccoli

Ingredients (Chicken Piccata):

2 skinned boned chicken cutlets or breasts*
2 tbsp flour
1 tsp paprika
1 tsp ground red pepper
Olive oil, to cook
2 tbsp dry white wine
2 tbsp lemon juice
2 tbsp butter or margarine
1/2 tsp veggie or chicken flavoured bouillon granules
1 tbsp chopped fresh parsley (optional)

{*Note. I use chicken cutlets because the idea of having to pound a chicken breast does not appeal to me in the slightest. You can also use a boneless chicken breast and flattento about 1/4 inch thickness using a meat mallet. I used my President's Choice Simulated Chick'n Breasts here again.}

1. First, I combined the flour, paprika and red pepper in a shallow bowl. I used extra paprika because I couldn't find any ground red pepper.


2. I then dredged the chicken breasts/cutlets in the flour mixture, until they were coated on both sides.


3. I heated the pan with the olive oil in it over about medium-high and added the chicken. I then cooked the chicken for approximately 3 minutes on each side (depending on the size of the chicken), and removed it and kept it warm for a few minutes while I did the sauce.


My veggie chick'n version cooking:


4. I then added the wine, lemon juice, margarine, and buillon granules to the skillet, and stirred the mixture constantly until the butter melted.


5. The final chicken version. SB decided to place his chicken right in skillet to soak up the juice in the pan and sear the meat. The recipe calls for you to actually drizzle it overtop of the warmed chicken (which I did, below). Either way, I'm sure it's fine, although it was annoying that my sauce ran in my plate.


Veggie Chick'n Version:


Overall, this chicken was pretty good. Not difficult, and the flavour was fairly decent. We will probably do it again, perhaps adding our own ingredients as we go. I will definitely cook mine in the pan again to get that seared look.


Ingredients (Broccoli w/ Creamy Chive Sauce):

2 stems of broccoli
1/3 cup water
1/2 tsp veggie-flavoured buillon granules
1 tbsp butter or margarine
1 tbsp all-purpose flour
2 1/2 tbsp milk
1 1/2 tsp freeze-dried chives
1 tsp lemon juice
1/2 tsp mustard

1. First, I washed and steamed the broccoli until tender crisp.


2. I then placed the water in a 1-cup measuring cup and microwaved it on high for 40 seconds. I stirred in the bouillon granules until they are dissolved, and set the mixture aside.


3. After this, I placed the butter in another measuring cup nad microwaved it for 10 seconds uncovered (until the butter melted).

4. I then added the flour, and stirred until it was smooth. Once smooth, I added the bouillon mixture, and milk, and microved the stirred mixture on high for 2 minutes (or until thickened and bubbly, stirring half-way through).


5. After the mixture was thickened, I stirred in the chives, lemon juice, and mustard.


6. At this time, the broccoli was done, so I drained it, placed it on our plates, and drizzed the sauce overtop.


The broccoli, in the end, was just OK. I've definitely had better. I felt like the sauce was a bit slimy, or perhaps the taste could've been accentuated with more mustard. If I do it again (doubtful), it would need a lot of tweaking, and definitely more punch.

Overall dinner:

Baked Chicken in White Wine Sauce

THURSDAY, MAY 7, 2009

4.5 stars (out of 5 - delicious and super easy!)

Tonight MK is coming for dinner and I really want to make him a good, home-cooked meal. I decided on this recipe because I have made it a few times (and therefore know it's safe!), is simple, and cooks for an hour, which leaves me free to do other things (such as clean up) in the meanwhile.

Ingredients:

~4 chicken breasts (original recipe calls for 4-6)*
1 can cream of mushroom soup
2/3 of a can of dry white wine
2 gloves of garlic
A small handful of grated Asiago cheese on top of each chicken breast*

~1-1.5 cups of crushed cornflakes
2-4 tbsp butter, melted*

*{Note. The original recipe calls for 4-6 chicken breasts placed in a 9X13 pan. I usually do 2 chicken breasts in a very small baking pan

1. First, I added the 2 garlic cloves to the mixing bowl.

2. I then added the mushroom soup, and used the can to also add 2/3 can of white wine, and seasoned with pepper. I actually did this step earlier in the day, and then refridgerated everything until it was ready to cook.


3. In the meanwhile, I melted the butter and added it to the crushed cornflakes until I had the consistency here:


4. I greased the baking sheets, and added the 2 chicken breasts to one, and the chick'n tenders to the other.


5. I placed a handfull of shredded cheese to the top of each.


6. I then very gently spooned the mixture over top of the chicken- you do not want the cheese to fall off, but you also want to make sure that the chicken breasts are coated. I then topped each chicken breast with the cornflakes.


For the simulated chicken, I coated it more like a casserole.


7. I placed it in the oven at 350F for 1 hour (or until the chicken is cooked). The other great thing about this recipe (besides being delicious) is that if you are not totally ready to eat it after an hour (say you have other dishes still cooking), you can cook it up to an additional 10 minutes and it will still be good. At least that's what I have done!

Here is the veggie one: {the other pic didn't turn out :(}


I served it with sour cream mashed potatoes and asparagus. I guess the only problem with the dish is that it doesn't look so great on the plate as it does not have a very neat, clean presentation (therefore, no pic!).