Showing posts with label Sides. Show all posts

Strawberry Spinach Salad w/ Poppyseed Dressing

FRIDAY, AUGUST 20TH, 2010

In an attempt to get back to our post-vacation "health", I decided to try to make salads a more interesting part of our meal. There are so many good ones out there that are super simple, and very yummy. I came across a blog which had this recipe (http://fortheloveofcooking-recipes.blogspot.com/2010/06/strawberry-spinach-salad-with-poppy.html). I decided to try it out, with my own modifications.

Ingredients:

Salad:

Baby spinach
Strawberries
Green onion
Goat cheese (optional

Dressing:

1/4 c. white wine vinegar
1/3 c. vegetable oil
2 tsp. granulated sugar
1/4 tsp. dry mustard
1/8 tsp. salt
2 tsp. poppy seed


1. I first prepared the poppyseed dressing by combining the sugar, vinegar, salt, and mustard in a food processor, and processing for 20 seconds.


2. I then added the oil and blended on high for an additional 10 seconds.


3. I removed the dressing into a bowl, and stirred in the poppy seeds, and refrigerated until I needed to use it on the salad.


4. For the salad, I simply combined the spinach, sliced strawberries, green onion, and goat cheese (we had some left over in our fridge).


5. I just spooned the dressing over top as needed, but you could also combine and toss it all together.

Overall, this was a pretty good tasting salad. Hard to screw up! I would have liked if we had more goat cheese to add to it, as I felt it went well with the dressing and strawberries. Will definitely (try to remember to) do this again!

Sweet Potatoes

TUESDAY, MAY 4TH, 2010

4 stars (out of 5 - the simplest, yet delicious, sweet potatoes!)

I don't usually like sweet potatoes, but I was inspired by my new cast-iron frying pan to purchase one and try it out. I wasn't disappointed! With the guidance of PTL, these turned out so well, and were incredibly easy.

Ingredients:

Sweet potatoes (I used 1 which = 3 (very) small side dishes)
Olive oil

1. First, I peeled the sweet potatoes, and cut it into cubes.

2. I added them to a microwaveable bowl, and zapped them for 3 minutes. I had originally added these to the oven, but they weren't baking quickly enough, so I only needed to microwave them for 3 minutes. I would recommend microwaving them at 2 minute intervals, stirring after every 2 minutes. They cook very quickly, though. You want them to be just a tiny bit undercooked at this point.

3. I then heated my (new!) cast-iron frying pan, added a bit of oil, and added the sweet potatoes when it was hot.


4. I cooked over medium heat, until they were slightly burnt on some of the sides. This didn't take long with my new pan.

5. I then served them with my pork recipe: http://etryingtocook.blogspot.com/2010/05/pork-tenderloin-w-sage-parsley-crust.html


Overall, I loved these! I like the flavour my cast-iron pan added to them and the texture was great. This was a fantastic way to mix things up and I will definitely be making them again.

Stuffed Zucchinis - GV Style

THURSDAY, APRIL 29TH, 2010

4-4.5 stars (out of 5 - simple, yet impressive and delicious!)

GV gave me this recipe at one of our many in-between-patient meetings, where we love to talk about anything but the stress of our internship! This is really a simple recipe that looks super impressive and tastes just as good. I love the heartiness of it, and the blend of all the flavours.

Ingredients:


Medium sized zucchinis
1 shallot per (whole) zucchini, finely chopped
Butter
1 slice of white bread per zucchini (whole), torn into bite-sized pieces
Splash or two of milk or cream
Shredded cheese (either Havarti or Gruyere)*
Salt and pepper

{*Note. I have made these two times: the first was with Gruyere cheese, which was great; this time I made it with Havarti, which was also good and browned easier. Basically, any good, strong cheese will work, depending on your preference}.

1. {Preheat oven to 350 or 375F} First, I cut the zucchinis in half, and scooped them out. I chopped the zucchini "insides" and set them aside.


2. I then heated a pan over medium heat, and added butter. Once it was hot, I added the shallots and cooked for about 3-4 minutes.


3. Once the shallots were semi-cooked, I added the zucchini "insides" and cooked for about 3-5 minutes.

4. As this was cooking, I tore the bread into small pieces, and added a dollop of milk so that the bread-milk mixture was moist, but not soggy.


3. I then added the cooked zucchini/shallot mixture to the bread...

4. ... and stirred in the cheese, mixing everything well.


5. I then stuffed the zucchini halves with the mixture...


6. ... and topped with extra shredded cheese.


7. I then placed them in the oven for about 10-14 minutes.

Final product:


Overall, I found these to be a delicious accompaniment to any meal, or as a main part of a meal (which I did as a replacement to a meat, served with a salad). The flavours and textures are ideal, and they are simple to make (and hard to mess up!) which I love. These will definitely become a regular in our household. Thank you, GV!

Green Beans

TUESDAY, MARCH 30, 2010

3.5 stars (out of 5 - an okay, but not too exciting veggie dish - perhaps better if I don't overcook!)

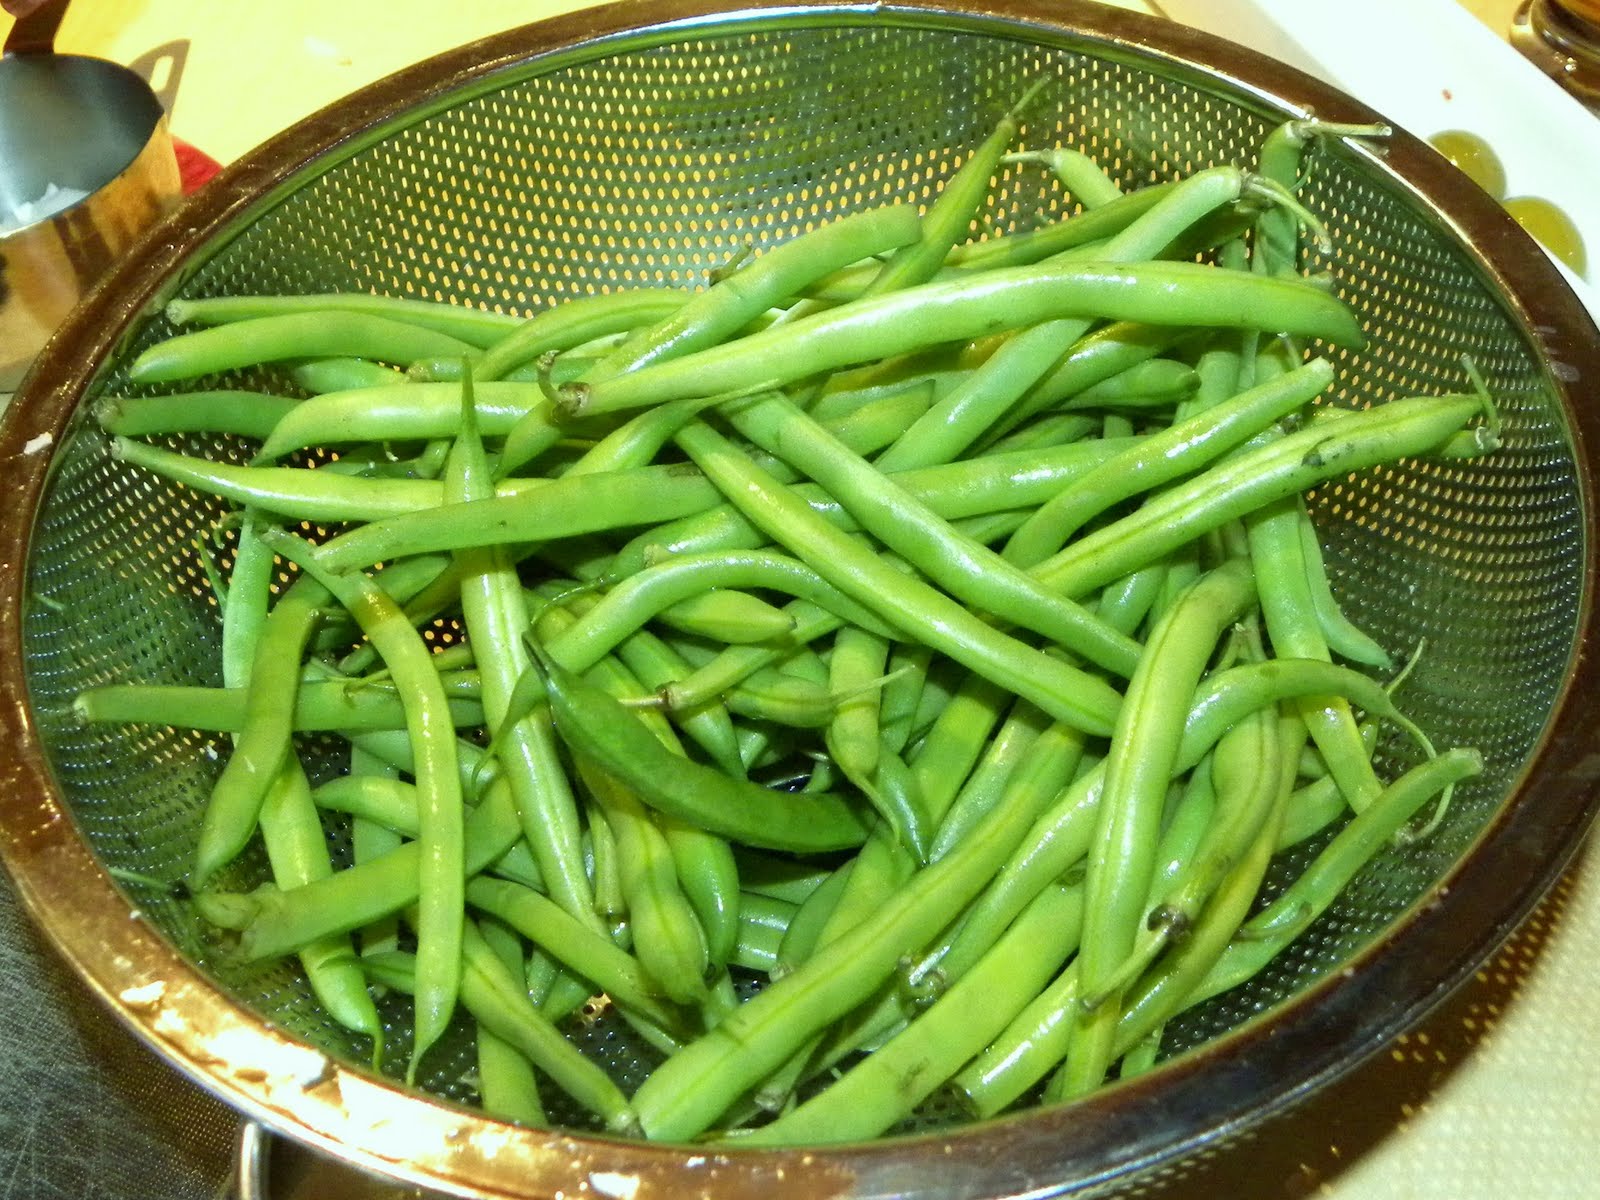
I wanted to try another recipe from Pioneer Woman, and also expand my repertoire of vegetable sides (I'm always using asparagus!). SB really likes green beans, so when I saw this recipe I thought it would be perfect. It was pretty good, but because I was also making another dish (fish - see following post), I didn't plan the timing so well, and they ended up being a bit overcooked. If there was one thing I could improve right now, it would definitely be my timing of dishes (or lack thereof!). Here is the link to the original recipe: http://thepioneerwoman.com/cooking/2008/06/fresh-green-beans-one-way/

Ingredients:

1 lb green beans*
1 cup chopped onion
2 cloves garlic
1/2 cup chopped red bell pepper
1 tbsp butter
1 tbsp olive oil
1 cup chicken or veggie broth
1/2 tsp salt
Ground black pepper

{*Note. I probably used a bit less... see picture.}

1. First, I washed the green beans and snapped the stems off.


2. I then chopped the onion fairly finely...


3. ... and the red pepper (again pretty finely).


4. I then heated up the oil and added the butter over medium-low heat.


5. When it was hot, I added the onion and the garlic, and cooked for about one minute.


6. I then added the green beans and stirred. I cooked these for about one minute (until they were bright green).


7. I added the broth and the red pepper, and stirred (salting it as needed).


8. I then turned the stove to low-medium heat, and cooked it covered (leaving it open a crack for the steam to escape)for about 30 minutes (to your liking).


Final product (slightly overcooked)


Overall, I enjoyed the green beans, but would keep a better eye on them so that they don't overcook. They're not too terribly exciting, but I guess it's a nice alternative to my regular ol' asparagus. I'll make them again and try to get the timing better.

Zucchini Stuffed w/ White Bean Pesto (Slow Cooked)

SUNDAY, FEBRUARY 14th, 2010

4 stars (out of 5 - simple, delicious, no-stress side dish!)

I decided to try a recipe out of my new Vegetarian Slow-Cooker book (thanks, PTL!) to make part of our Valentine's Day dinner (SB making the other part). This recipe appealed to me because it seemed very simple (I am not up for anything complex on my weekends!) and I could make it a few hours ahead of time, and then relax. This is a delicious side dish, that I would definitely recommend.

Ingredients:

4 small-medium zucchinis*
2 tbsp olive oil
2 green onions, chopped
1 medium tomato, chopped coarsely
1-1.5 large garlic clove, pressed
1/4 - 1/3 cup pine nuts, toasted
1 (small) can white kidney beans, drained and rinsed well
2 tbsp fresh parsley, chopped
2 tbsp fresh basil, chopped

{Note. The number of zucchinis depends on how many you can fit in your slow-cooker!}

1. First, I prepared the zucchinis by hollowing them out with a small spoon. Keep the pulp and chop it up.


2. I then added 1 tbsp of the olive oil to a sauce pan, and heated it over medium heat. When it was warm, I added the zucchini pulp, garlic, and green onions. I also added some salt and pepper. I covered and cooked for about 10 minutes, just softening everything up.


3. As the veggies were cooking, I toasted the pine nuts over medium heat for about 4 minutes (watch them, they burn fast!).


4. I also prepared the parsley, basil, tomato, and rinsed the beans. So little stress!


5. After the zucchini/green onion/garlic combo had cooked for 10 minutes, I added the beans, pine nuts, tomatoe, and fresh herbs...


6. ... and stirred everything very well.


7. I then scooped the veggie-bean mixture into the zucchinis. There was enough to fill 4 halves, but my slow-cooker could only fit three :(


8. I placed the zucchini in a lightly oiled slow cooker, drizzled a bit of olive oil over them, and switch it on "Low" for about 3 hours. I put them on for a bit more than 3 hours and they were slightly overcooked. I would even bet that 2 hours would be good enough.


Overall, these were pretty delicious, and very low stress. I actually really liked the veggie filling on its own. I think the slow-cooker was ideal for this recipe, as it cooked the zucchini without drying everything out. I would definitely make this again, but cook them for a bit less time. I would also prefer if I could fit one more in my slow-cooker in case we have a couple of people over for dinner.

Home-made Christmas Stuffing

FRIDAY, DECEMBER 25TH, 2009

3.5 stars (out of 5 - good, but a bit mushy after I left it for too long!)

Silly me! I went to make my Christmas dinner (veggies, mashed potatoes, turkey rolls with stuffing) and realized that I had forgotten to buy the stuffing! With the stores closed, I resorted to measures seen only in previous generations: I made my own from scratch. It actually turned out well!

Ingredients:

4 cups bread crumbs (stale - leave out overnight)
1/2 cup melted butter
1/2 tsp salt
2 tsp thyme (to taste)
1/2 onion, finely chopped
1/2 - 1 cup chopped celery

1. First, I broke the bread pieces up into small bite-sized pieces...


2. ...and added them to a large bowl. You can then leave them out for the day, to make them stale.


3. Because I hadn't planned ahead, I didn't have the opportunity to leave my breadcrumbs out overnight (or during the day), so I simply baked them in the oven at 350F for about 3-5 minutes (check on it - our oven takes longer to do things than most!). When they were a bit crispy, I took them out and let them cool.


4. I heated the butter on medium heat until it was all melted, and then added the onion and celery.


5. I then stirred everything together and cooked for about 8 minutes.


6. After the celery was tender and everything was mixed together well in the pan, I removed it from the heat, added the bread crumbs, and stirred well.


7. I then greased a shallow casserole dish, and added the stuffing (about 1-2 inches thick), covered it with foil, and cooked it for 25 minutes. You can serve it right away or leave it for a while.


In the end, it turned out very well. The only suggestion I have is to eat it right away. I left my off to the side for a while and it got pretty mushy. I really like the crisper pieces that were on top of the casserole dish. Next time!

Double Baked Stuffed Potatoes - Brocolli & Chive

TUESDAY, DECEMBER 1ST, 2009

4.5 stars (out of 5 - a bit of a hassle to make, but worth it in the end!)

These are one of my all-time favourite sides. They are a bit fussy to make (specifically, I tend to burn my hands trying to hollow out the baked potatoes), but I think worth it in the end. They are a great side dish to a meal (albeit filling!), and I sometimes even eat these as a small meal on their own (or with a salad).

Ingredients (for 2-4 people):

2 large potatoes*
~1 cup grated old cheddar cheese**
~2/3 cup chopped green onion**
1 1/2 cups broccoli**
Sour cream***
Milk***
Salt and pepper***

{*Note. 2 large potatoes will make enough for 4 people if you give them each half (as part of a bigger meal). I usually do 2 potatoes for SB and myself alone, as I will eat a whole one myself (in the place of meat) or save it for lunch the next day.}

{**Note. These amounts are all approximate. You can see the amounts from the pics below, but I do it all to taste. I end up putting quite a bit of green onion in, as the flavour isn't very strong. I just have one suggestion, which is to stir in the broccoli gradually (see below), so that your mixture doesn't end up too dense.}

{***Note. These are suggestions for making the mashed potato part of the recipe. You can use whatever you normally use to make mashed potatoes.}

1. First, I baked the potatoes in the microwave. This usually takes about 6 minutes. Don't forget to pierce them with a fork first!

2. While the potatoes were cooking, I chopped and steamed the broccoli. I usually cook it until it is tender, rinse under cool water (to prevent them from continuing to cook and turning into mush), and set them aside.


3. I also prepare the cheese and green onion during this time.


4. Once the potatoes were cooked, I (carefully!) cut them in half, leaving the skin intact, and let them cool for a little while. Watch out, they're hot!


5. Once the potatoes were cooled to a point I could handle them, I scooped out the inside, leaving a few millimetres around the edge and on the bottom, and placed the extra potato in a medium-sized bowl.


6. I then added the sour cream, milk, salt, and pepper to the potato, and mashed them together. You can add whatever ingredients you wish, and make the mashed potatoes your regular way (e.g., with butter, etc.). Just make sure they're not too runny.


7. After making the mashed potatoes, I stirred in the broccoli, chives, and 1/2 the cheddar cheese, and added salt & pepper to taste.


8. I then scooped this mixture into the potato shells...


9. ... and sprinkled them with the remaining cheese.


10. I baked them at 425F for about 20 minutes (until hot).


Although this recipe can be a bit time-consuming to make, I think it's worth it. In addition, I have made this recipe for company before, and it was very stress-free, as I could prepare them ahead of time, put them (covered) in the fridge, and then pop them in the oven 20 minutes before we were ready to eat. I also like how you can play around with the ingredients to your own taste. Overall, a nice, substantial complement to a meal!